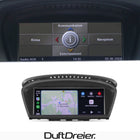
Instructions for DuftDreier Linux Carplay Navis for CCC and CIC
Common problems & Your solution:
Your original menu is not displayed correctly?
Select the correct original screen size:
Settings > Vehicle settings > Original screen resolution of the car
For sound problems:
Please connect the system to the Connect original AUX IN with an AUX cable, then connect to Bluetooth from CarPlay and listen to music.
Possible sources of error:
- In the old system, AUX IN must be stored as media source
- No AUX cable connected (from AUX OUT on the wiring harness to AUX IN from the vehicle)
- Optic cable not re-pinned
Your PDC view is not displayed (correctly):
If you have general questions about installation, please watch our video instructions on YouTube.
Here is the video tutorial:
Instructions for CIC:
Here is the video tutorial:
After installation, it is necessary to select the correct original system in the CIC settings:
Settings > Vehicle settings > Original screen resolution of the car
We are working on a guide with pictures.
Instructions for CCC:
Here is the video tutorial:
1. Before installation

2. Loosen both screws of the navigation screen

3. Carefully pry the screen forward

4. Carefully remove the screen

5. Disconnect the LVDS and power connectors.
The screen is no longer needed.

6. Loosen the middle interior trim, start best on the right
Tool: https://duftdreier.com/products/innenraum-montagewerkzeug

7. Remove the entire bar

8. Disconnect the hazard warning light unit connector
Now the Interior trim must be removed

9. Remove the screws of the climate control panel
Left and Right

10. Carefully loosen the climate control panel

11.Now remove all plugs from the control panel

12. The panel underneath is carefully levered from both sides and thus released

13. Remove the 4 screws behind the cover

14. Remove the cable from the screen and the power cable

15. Now lay the new wiring harness

16. Now connect the Linux screen

17. The screen can now be inserted into the tunnel, start insert the retaining lugs below

18. IMPORTANT: The optic cable must be unplugged from the original connector (this will be plugged back into the new connector later)

19. Connect the old (original) plug to the new plug

20. Now the optic cable is plugged into the new connector (simply plug it in)

21. The new connector (with optic cable) is now connected to the CCC computer

22. The included AUX cable doesn't need to be connected. AUX IN is taken directly from the computer.
23. Under Settings, the correct original system must be selected; with CCC, this is usually set at the factory (important for switching to the original system).
24. Now a comprehensive functional test is carried out
25. Dismantling in reverse order
Factory password: 8878
Possible sources of error:
1. Plugs are not plugged in properly and are loose
2. Optic cable not re-pinned
For sound problems:
Please connect the system to the original AUX IN, other possibilities are usually the cause of sound problems
Problems switching to the original menu:
In the system settings, the correct original system must be selected. Once this is done, switching works without problems (long press menu key).


